Before you pull the engine, drain the oil out the engine while it is still on the airplane. Since most flat aircraft engines have a wet sump, you want to minimize the amount of oil that's going to come out all over your hanger floor when you start pulling the engine itself apart. It is much better to dump only the residual quart vs. the full 7 to 10 quarts that your engine normally contains. Trust me, there will still be plenty of oil left to make a satisfying mess.
To get the engine off you'll usually have to remove the cowling, propeller, all of the controls and hoses, and the exhaust manifold. This is where you find out where all the dirt and grit you taxi over goes to. Further you get very familiar with any oil leaks your engine has because the oil ends up all over you.
Again you'll save yourself a lot of trouble and head-scratching later by taking the time to bag and tag all the parts as you're removing them, and to photo-document clamps, hoses, fittings, and the orientation of all of the above.
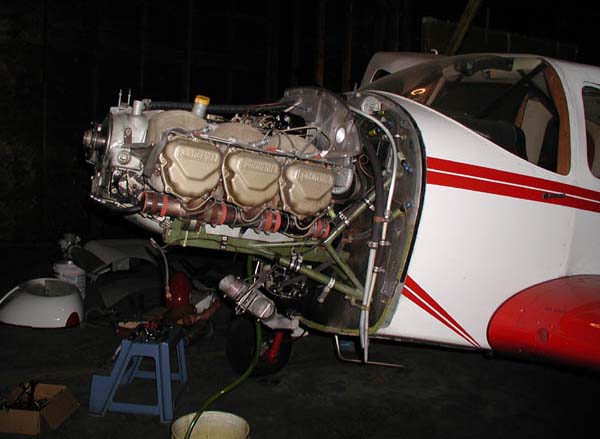
Here's my Bellanca with the cowling and prop removed:
After the engine was disconnected and hoisted onto the crane, a naked engine mount:

Lastly I removed the engine mount as well because I wanted to refurbish it along with the engine.
The first challenge after removal is to put the engine up onto the stand, which involves bolting the prop flange to the stand (easy) and then wrestling the engine into an upright position without dropping it during the process (tricky). Two or more people and potentially a block and tackle hoist separate from the engine crane are recommended.
Then it is disassembly time. Now you really get greasy. With an O-470 start with the baffles, intake, accessories, accessory pads and drives.
Then the cylinders and pistons and finally undoing all the case bolts and splitting the case. Don't forget to remove the idler gear pin which ties the case together (doh!). As you pull the case apart lots of oil and some miscellaneous parts will fall out, so catch the ones you care about like the gears. Hopefully you won't need to use too much "persuasion" with the soft mallet for gooey drive pads and parts.
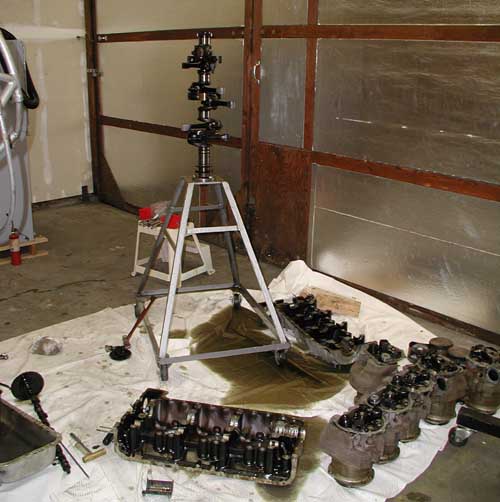
Lastly there's the connecting rods to remove, and on an O-470 disassembly of the accessory pads and drives like the starter adapter. Pictures of fitting orientation on accessories are invaluable.

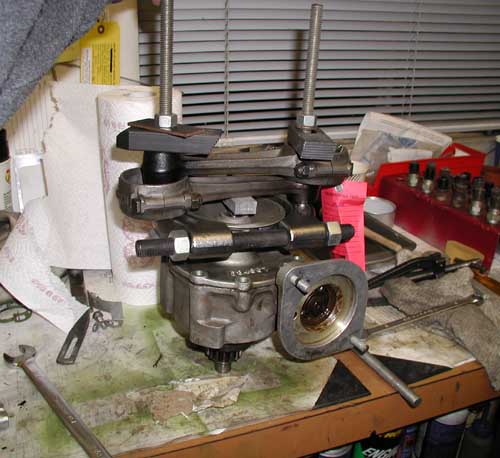
On my engine we could not get the generator drive pulley to come off of the starter drive shaft, with the pullers we had were only bending the pulley. Lacking a proper tool, we improvised this contraption of a splitter, threaded rods, some machining holddown blocks, and two red-tagged C-65 connecting rods. It was worth a picture and it did work, but since the original tool damaged the pulley it had to get replaced.
Lastly there's cleanup for the pieces being sent to the overhauler. As you remove the loose oil from your parts, you get to either feel good about your decision to overhaul, or else you can really scare yourself if you discover excessive wear on your engine parts. In my case, the internals were in good shape and the bearings had no excessive wear.
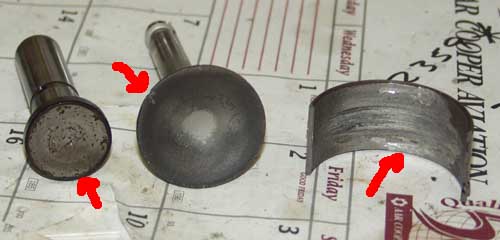
I've also seen some engines where you wonder how it ran at all. Here's a photo of a parts from a Lycoming IO-320 removed from a Citabria. This engine had been abused and apparently overheated. From left to right, note that the lifter surface is pitted, spalling metal, and badly cupped (it should be flat and polished smooth), the valve is cracked, and the babbit material on the rod bearing is scored and melted!