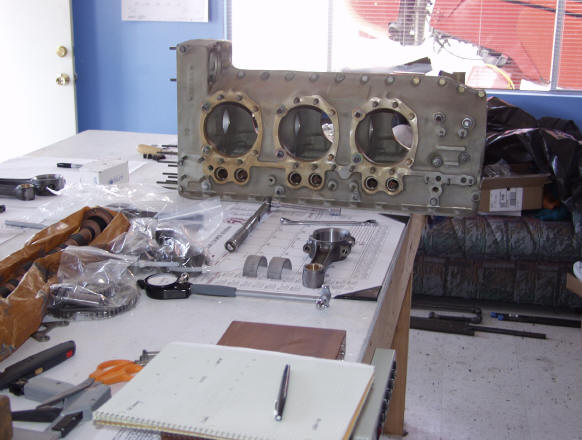
Measurements are also taken on each cylinder, piston, and piston ring (to check for piston ring end-gap clearance). This is a laborious process but worth it to ensure a perfect engine. You can best keep this organized by laying out the parts on a large table with obvious tags numbering each set of parts.
![]()
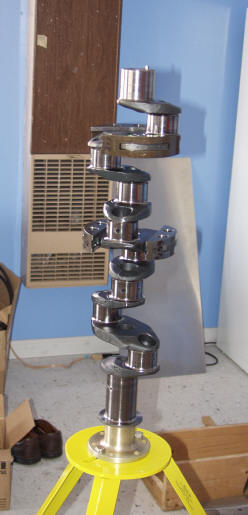
Then you get out the assembly lube and start again with a naked crankshaft. Assembly lube is really gooey, but that's the point. Connecting rods go on first, with proper cotter keying for the rod bolts.
Putting the case halves together and getting all of the gears and small bits included is a 5-handed operation. It might be easier to do the assembly with the case on the bench, but given an extra body doing it upright worked for us. You also have to take care to get the silk thread oil seal carefully placed on the case parting seam and avoid disturbing the seal during assembly. If this gets screwed up your engine will forever leak, and you won't know about it until the first start, so it is worth taking the time to get right.
Once the case is done then you install the pistons with rings and cylinders. Have a friend handy to hand you stuff while you maneuvering the piston with pin, rings, ring compressor, and the cylinder while your hands are coated with slippery goo. Once you clean up the goo, you get an upper body workout by following the torque sequence for the cylinder tie-down studs and through-stud nuts. On an O-470 you do it three times, one sequence to low torque, then to full torque, then again to make sure you got it right.
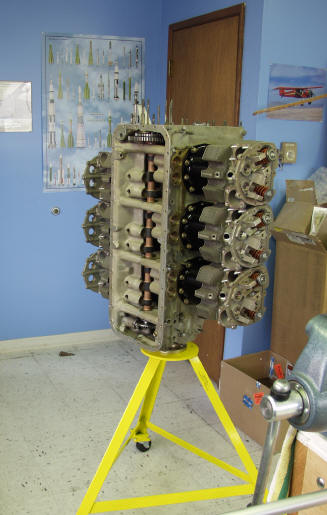
Once you get to this stage most of the visible assembly is done. There's lots of not-so-visible details to finish such as accessory drive pads, starter adapter, oil pump, tachometer drive, oil pan, oil cooler, and miscellaneous hardware like engine mount brackets, generator brackets, and the oil filler neck.
The final assembly steps are finishing the topend with pushrod tubes, pushrods, rocker arms and rocker shafts, and finally the rocker covers. I saved a few things until after painting, such as the front seal, installation of accessory pumps, and the intake manifold, but if you don't care about paint or you don't care that they're all the same color as the engine then assemble them all in one shot.